Page 3 of 3 FirstFirst 123
Results 21 to 30 of 30

Thread: Cabin in progress

  1. #21
    Senior Member Big_Holla's Avatar
    Join Date
    Dec 2006
    Location
    S.E.Michigan to live & S.E. Ohio to dream
    Posts
    7,165
    Excellent!! Glad to see your progress!!

  2. #22
    Member JMax510's Avatar
    Join Date
    Feb 2010
    Location
    Dauphin County,PA
    Posts
    66

    The Build

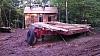
    Well the time had finally came when I was ready to do the build. My cousin and I drove out to Ohio last Tuesday in the early morning and my brother and 2 other buddies drive out Tuesday night. I got there early enough to go pickup 3 loads of stone to backfill the poured walls and get everything set up. Tuesday night it started torrential downpours which lasted on and off for almost 24 hours. The whole build site was a muddy mess and it definitely slowed progress and lowered workers moral. All we got done Wednesday was the floor joists and floor boards put down.

    Thursday we got all the walls up and started on the roof joists. Friday noon time my cousin and my other buddy had to go home so it was down to 3 of us. Friday we finished the roof trusses and started putting all the roof boards on. The biggest obstacle in that was the Amish didn't have any of the trusses on 4' centers and every board was cut to fit so we basically had to lay every piece out to see what number was on it when we tore it down.

    Saturday we started putting the foam board insulation on top of the roof boards and then sheeted with OSB plywood so when the metal roof is screwed down there wont be any chance of a screw hitting between roof boards. We came up 3 sheets short on OSB so we had to wait until Monday to get the plywood to finish.

    I made a jib boom for my skidloader to lift the walls and the gables into place. It id its job but at times the square tubing on boom was flexing like a fishing pole. It was high stress when I was in loader placing the walls. The other scary thing was being up on the back roof without the proper safety equipment but it had to be done.

    I have a contractor coming in to put a dark green metal roof on within the next 2 weeks. Next for me is putting in the sewer system, digging a 300yard line ditch to street for electric, gas and water and all the interior work.Click image for larger version. 

Name:	walls.jpg 
Views:	20 
Size:	102.4 KB 
ID:	10592Click image for larger version. 

Name:	joists.jpg 
Views:	20 
Size:	104.7 KB 
ID:	10593Click image for larger version. 

Name:	backwall.jpg 
Views:	21 
Size:	104.3 KB 
ID:	10594Click image for larger version. 

Name:	gable.jpg 
Views:	19 
Size:	106.9 KB 
ID:	10595Click image for larger version. 

Name:	roofjoists.jpg 
Views:	21 
Size:	103.4 KB 
ID:	10596

  3. #23
    Member JMax510's Avatar
    Join Date
    Feb 2010
    Location
    Dauphin County,PA
    Posts
    66
    Here are a few more pics. Everything turned out great and I'm very excited to get back out there. Click image for larger version. 

Name:	scary.jpg 
Views:	24 
Size:	101.1 KB 
ID:	10597Click image for larger version. 

Name:	back.jpg 
Views:	24 
Size:	103.7 KB 
ID:	10598Click image for larger version. 

Name:	front.jpg 
Views:	23 
Size:	103.5 KB 
ID:	10599

  4. #24
    Senior Member
    Join Date
    Oct 2008
    Location
    Brickerville (Lititz), PA
    Posts
    1,645
    Jim it looks outstanding. Really nice job.
    “I don't partake in assembly-line convenience. I don't say that killing things is bad while I hire people to kill things for me.” ~ Ted Nugent

  5. #25
    Senior Member mrbb's Avatar
    Join Date
    Feb 2008
    Location
    northeast PA
    Posts
    5,925
    looking good, love the fact you did it on a full basement/garage!
    I am sure that part will get tons of use, stays cooler in summer, and a great place to clean deer in the fall
    plus all the other million uses a garage gets

    keep up the good work!

  6. #26
    Administrator Mikebaker's Avatar
    Join Date
    Feb 2005
    Location
    S.W.OHIO
    Posts
    320
    Love it! That's a busy wknd for sure. And I have to agree about the basement/ garage. Great place to butcher up some deer.


    Sent from my iPhone using Tapatalk

  7. #27
    Senior Member Big_Holla's Avatar
    Join Date
    Dec 2006
    Location
    S.E.Michigan to live & S.E. Ohio to dream
    Posts
    7,165
    Holy smokes that is turning out GREAT!! You'll make a ton of memories in that cabin!!

  8. #28
    Senior Member Stumpy's Avatar
    Join Date
    Aug 2009
    Location
    New Lebanon, OH
    Posts
    372
    Good job. That's a great looking cabin.
    "All right, they're on our left, they're on our right, they're in front of us, they're behind us. They can't get away this time."
    LtGen Lewis B. “Chesty” Puller - USMC

  9. #29
    Senior Member offtheground's Avatar
    Join Date
    May 2010
    Location
    Clermont County
    Posts
    347
    Great looking cabin, we all are jealous!
    Patience and perseverance have a magical affect before which difficulties disappear and obstacles vanish."
    John Quincy Adams

  10. #30
    Member Weasel's Avatar
    Join Date
    Jul 2014
    Location
    Ashtabula County
    Posts
    56
    That's fantastic, nice job. You will be glad you put that basement under it. I am in a similar situation. I sold my old farm and bought a bigger place last year with no buildings on it. I went the pole barn route for a quick, cheap and easy build since I'll be doing the work myself. We set poles as soon as the ground thawed and I'm putting in windows, doors & siding now. Had to take a break to put fall plots in but I'm on schedule to have it done before archery season.

    Keep us posted as you get all the detail work done and start enjoying that beautiful cabin.

Thread Information

Users Browsing this Thread

There are currently 1 users browsing this thread. (0 members and 1 guests)

Posting Permissions

  • You may not post new threads
  • You may not post replies
  • You may not post attachments
  • You may not edit your posts
  •